Structure Capture: Getting Started Guide
How to Use Structure Capture (Step-by-Step)
Structure Capture is the scanning app designed to work seamlessly with your Structure Sensor, iPad, and iPhone! Every Structure Sensor 3 purchase includes a free one-year subscription to Structure Capture.
This guide will walk you through setup, calibration, scanning, and exporting your first scan.
Prepare Your Sensor
Before scanning, make sure your hardware and apps are up to date:
-
First, make sure your iPad is compatible with your sensor.
• Structure Sensor 3 iPad Compatibility Guide
• Mark II & Structure Sensor Pro Compatibility Guide
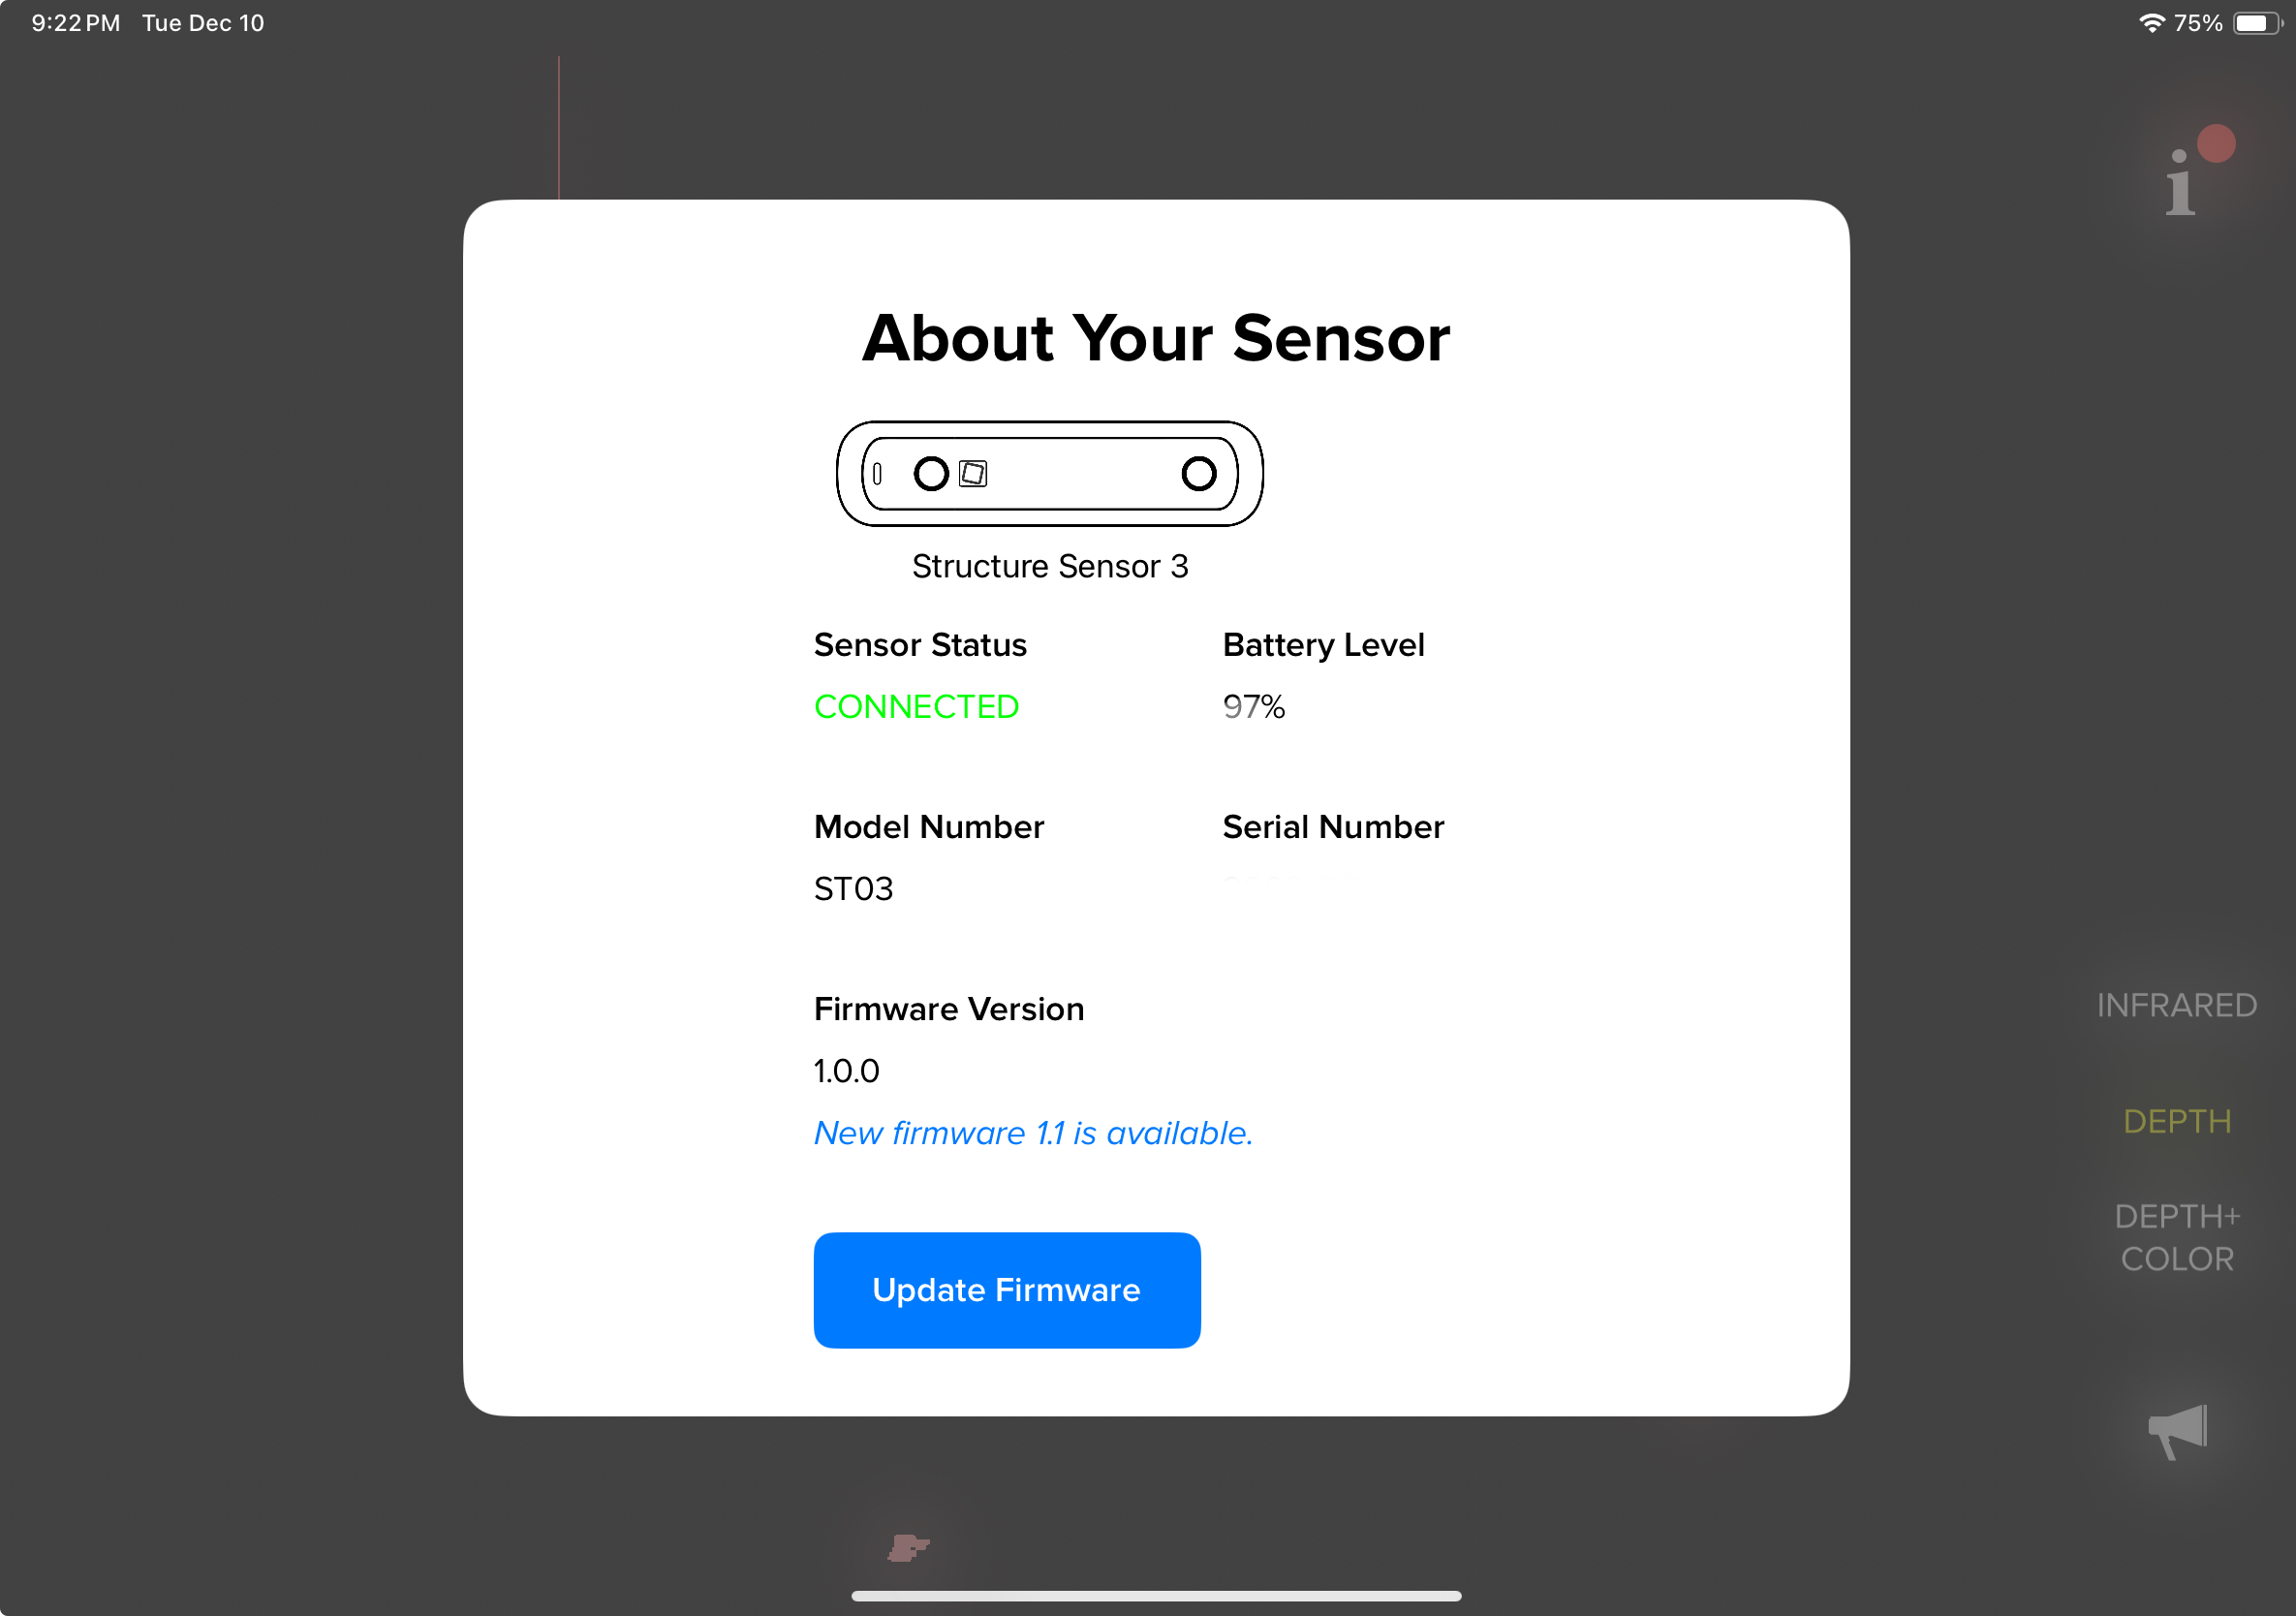
Update firmware: Download the Structure App and check for firmware updates.
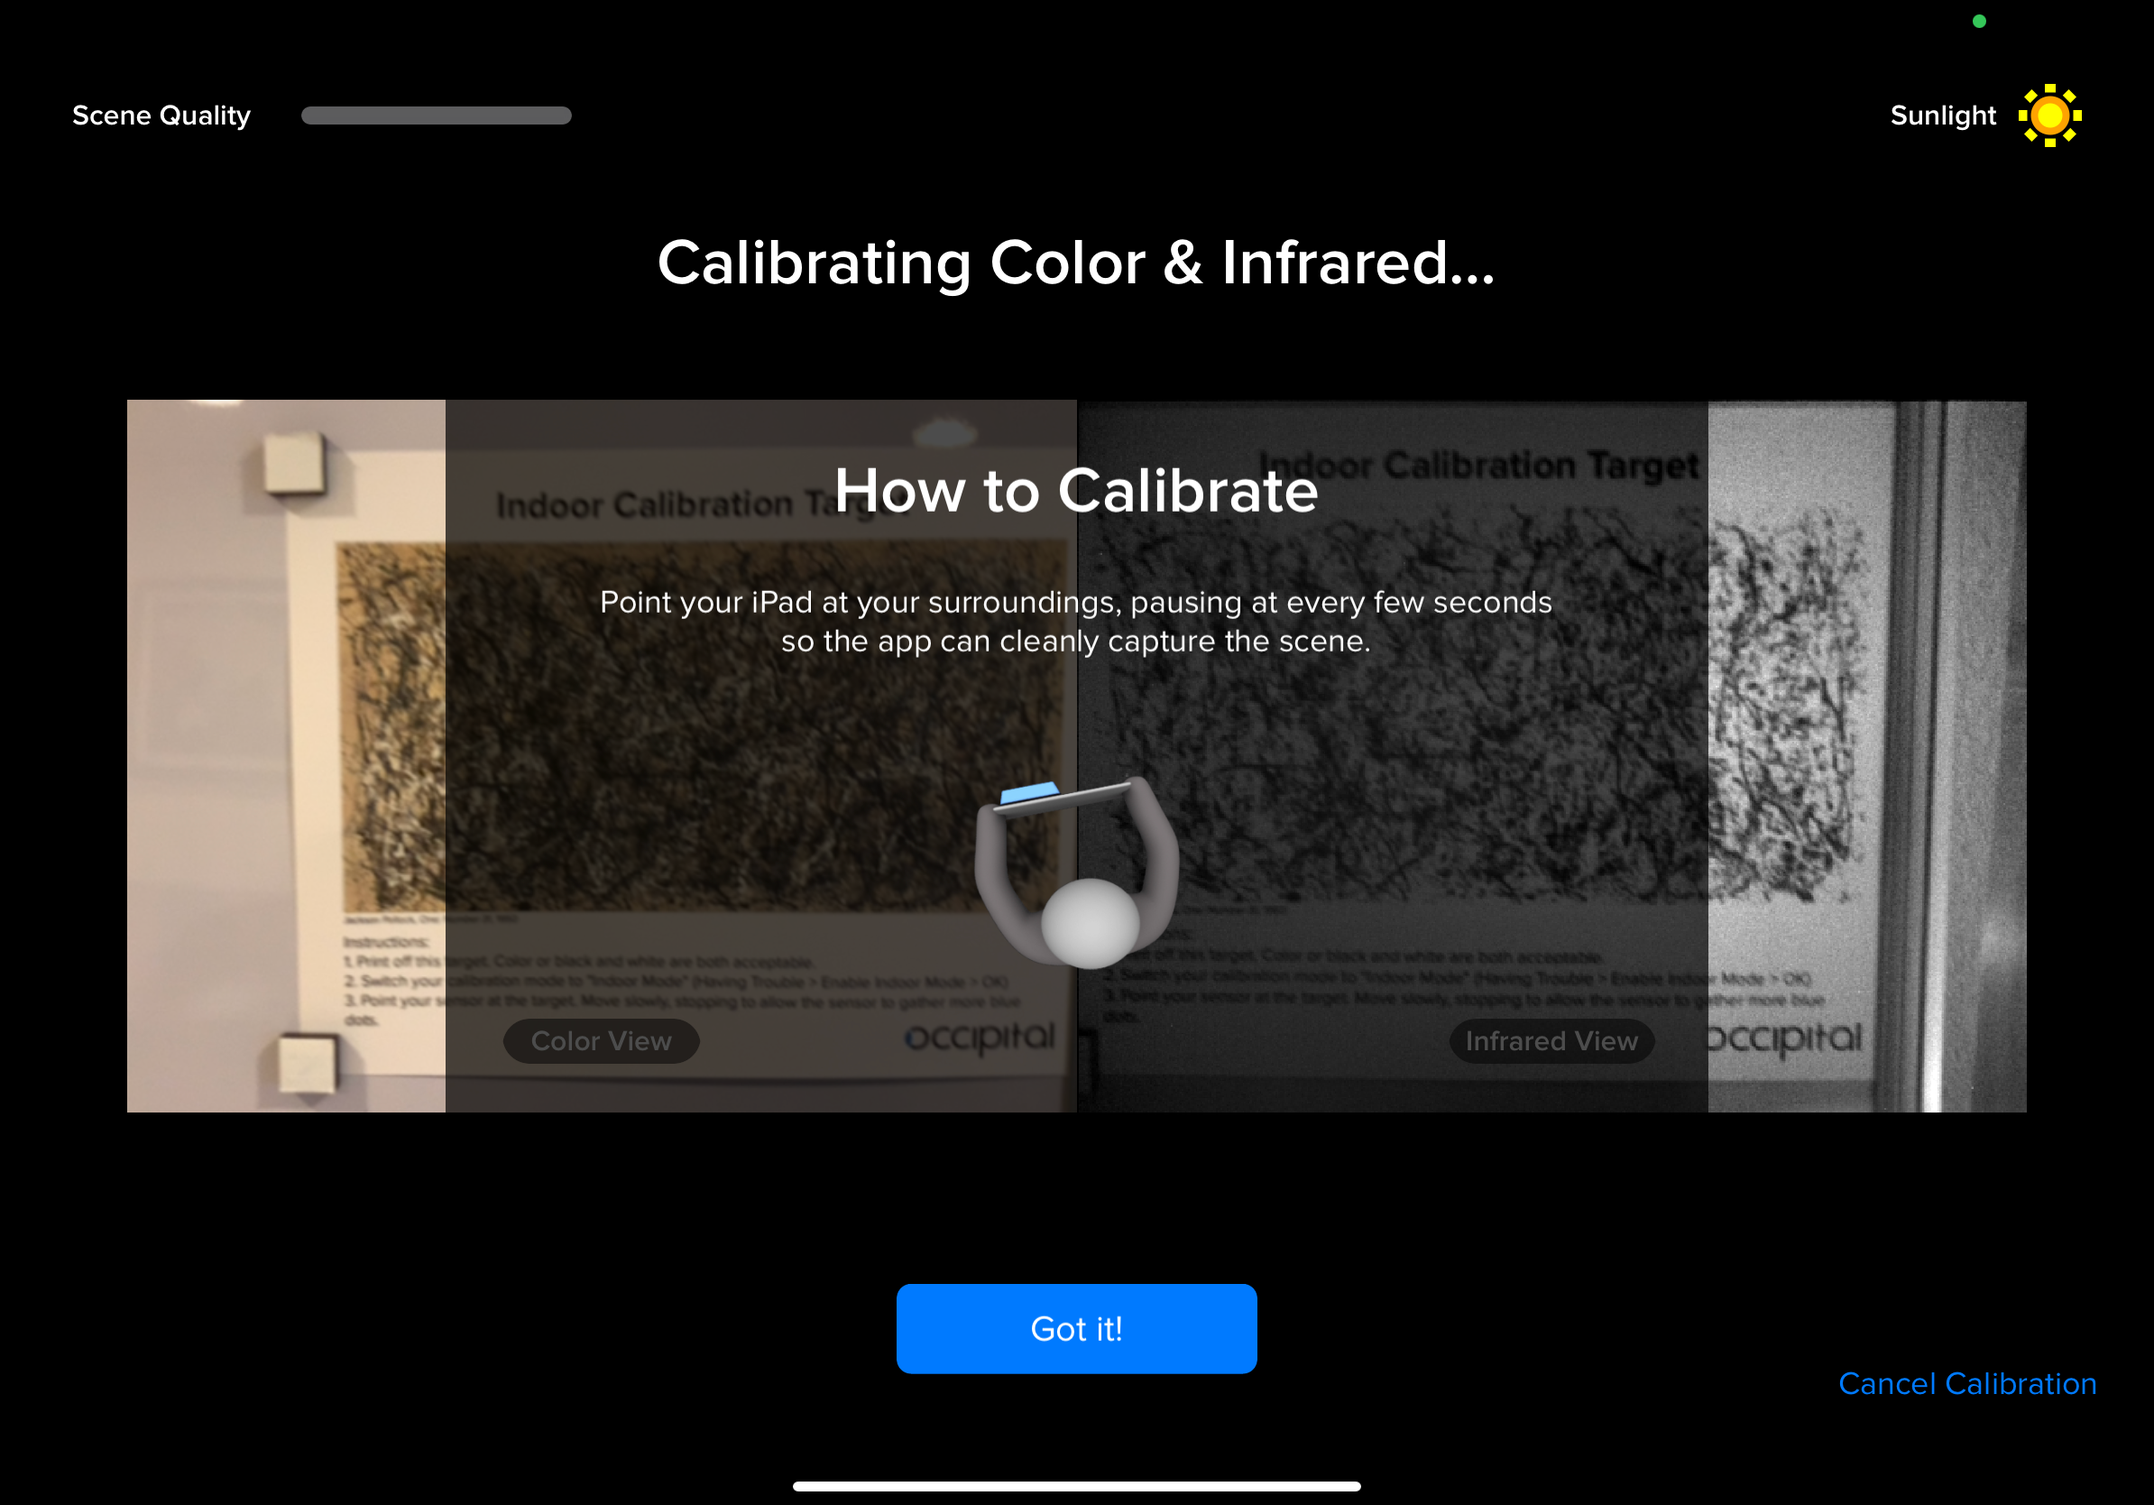
Calibrate your sensor: Install the Calibrator App and follow the calibration steps for your iPad.
Download the Structure Capture app from the App Store.
About subscriptions and the free trial:
Structure Capture uses a subscription model. You can download and begin scanning immediately without paying. Payment is only required when you export a scan.
At export, you’ll be prompted to either:
- Start a free 1-week trial,
- Purchase a monthly or yearly subscription, or
- Redeem a code included with Structure Sensor 3 purchases.


Open Structure Capture
Close any apps running in the background and open Structure Capture. Upon opening the app, you’ll see a prompt to either connect your Structure Sensor or to choose a different sensor type from the settings menu by tapping the gear icon in the top left.


Please note: Structure Sensors are not compatible with iPhones when using the Structure Capture app. To use your Structure Sensor, you’ll need a compatible iPad. iPhone users can still use the app with the built-in TrueDepth or LiDAR cameras.
See our Capture Settings Guide for a full breakdown of settings (presets, advanced options)
Adjusting the Bounding Box
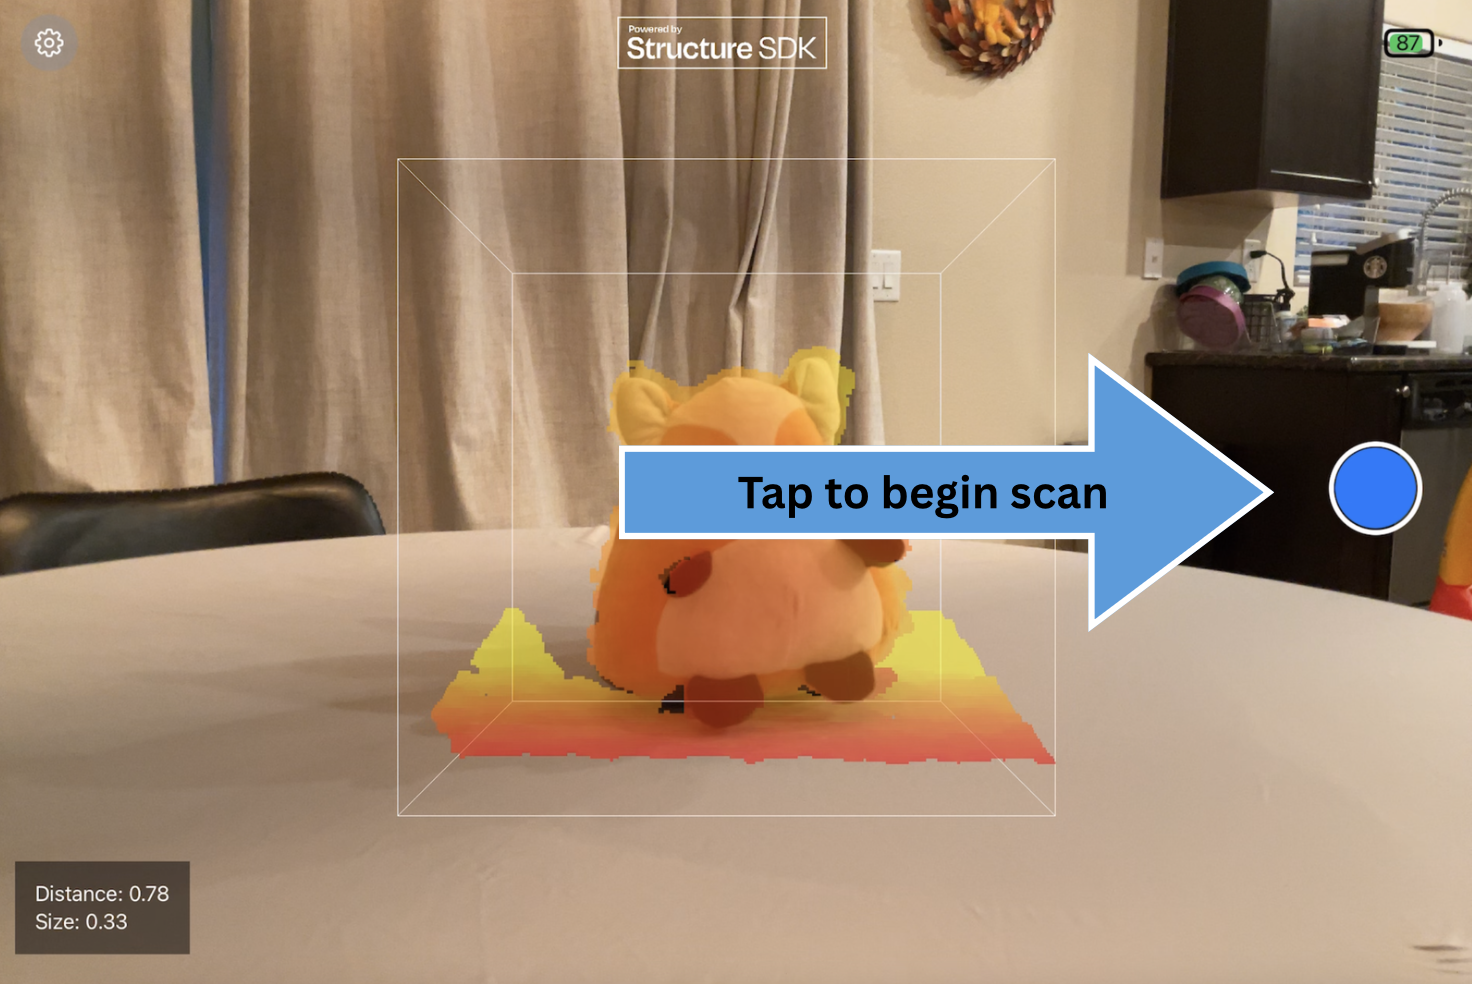
When your chosen sensor initializes, you’ll see the live sensor/camera view with a bounding box. This box defines the area your subject must fit inside to scan. Getting the bounding box right is critical to a successful scan.

Bounding Box Metrics Display

The small box in the lower-left corner of the screen shows the live distance from the sensor to the bounding box, as well as the current dimensions of the box (shown in meters) as you adjust it.
Basic Controls
- Resize: Pinch in/out with two fingers to make the box larger or smaller.
- Move closer/further: Slide one finger up or down to shift the box forward or back in space. (This can look like resizing, but it’s actually moving the box’s position. Check the Bounding Box Metrics Display to verify.)

Bounding Box Settings (found in settings menu):
These options control how the scan area (bounding box) is positioned and oriented in Structure Capture. Adjusting them helps you get the most accurate results depending on your subject’s setup — whether it’s placed on a table, the floor, or held in the air.
- Position
- User Defined – Allows you to manually set both the size and distance of the bounding box. This mode offers the most flexibility and control over how your scan area is defined.
- Auto (Tabletop) – Automatically positions the bounding box based on the detected subject and aligns it with a flat surface, such as a table or floor. You can adjust the size of the box, but not its distance from the sensor. This mode is best suited for scanning objects resting on a surface, rather than items held in the air.
- Align with Camera
- ON – Keeps the box locked to your camera view. Best for scanning things not resting on a surface, like a foot held in the air.
-
OFF – Aligns the box with the environment based on the iPad/iPhones gyroscope. When you turn your iPad/iPhone, the box will remain level with the environment.
Positioning and Color Overlay
When your subject is placed within the bounding box, Structure Capture displays a color overlay to help you gauge distance. This gradient overlay indicates how close or far parts of the subject are from the sensor. Deep red means closer, while yellow means farther away.
For the best results, aim for a reddish-orange color across the subject before starting the scan. This ensures the subject is within the optimal range, not too close or too far.
Tip: Try to position your subject as centered in the bounding box as possible, and adjust the box so it’s only slightly larger than the subject. A smaller, tighter box helps the app process data more efficiently, reducing lag and improving overall performance.

Once the subject looks properly positioned and colored within the bounding box, you’re ready to begin your scan.
Starting a Scan
- Tap the blue button to begin scanning. The bounding box will lock in place, allowing you to capture all angles of the subject.
- Move steadily around your subject (or rotate the subject if using turntable mode).
-
Tap the center button again to stop scanning.

Basic Scanning Tips
For the best results with Structure Capture, keep these simple scanning techniques in mind:
-
Move Slowly & Smoothly
Walk or pivot steadily around your subject. Quick or jerky movements can cause tracking to drop.
-
Stay in Range
Keep the subject within the orange-red overlay distance. Too close or too far will reduce detail or cause tracking errors.
-
Cover All Angles
Try to walk around your subject 360° so every surface is captured. Missing sides will create holes in the mesh.
-
Keep Lighting Consistent
Even, indoor lighting works best. Very dark environments or direct sunlight may interfere with the sensor’s infrared system.
-
Hold the Subject Still
If the subject moves while scanning, the mesh may warp or blur. (This is especially important when scanning people, pets, or children.)
-
Know the Limits
Highly reflective, transparent, or shiny objects are difficult to capture accurately. For best results, scan matte or textured surfaces.
Here is an example of a scan using the above techniques:
Review and Export
After stopping, you’ll see a preview of your 3D mesh.
- Inspect: Zoom/rotate to check details.
-
Add texture: Tap the paintbrush icon to apply color texture and run basic fixes like hole filling.
Important: If you export before tapping the paintbrush, your file will not include textures.

-
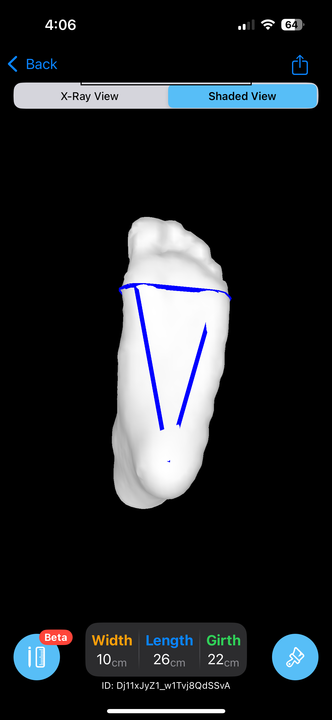
Foot Measurement / Landmark Detection (Beta): Tap the Measurement icon to enable built-in detection of the 1st and 5th metatarsal landmarks, along with automatic width, length, and girth measurements. This feature works on any clear, well-aligned foot scan.
When you export the mesh, a landmark detection JSON file is included alongside your mesh file, containing the coordinates of the detected landmarks.
- Export: Tap the share/export icon (top right) to save your file. Options include:
- Email (via Apple Mail – setup instructions here)
- AirDrop to another Apple device
- Save directly to the Files app


Your OBJ/STL/PLY file can be opened in software like Blender, MeshLab, or most CAD tools.
More Resources
- For in-depth explanation of each setting: see the Capture Settings Guide
- For calibration instructions: see the Calibrator Guide